1. Locate and select the DataIQ Report

2. Open the Report Schedules Window
Click on the schedule icon ![]() at the bottom of the Window.
at the bottom of the Window.

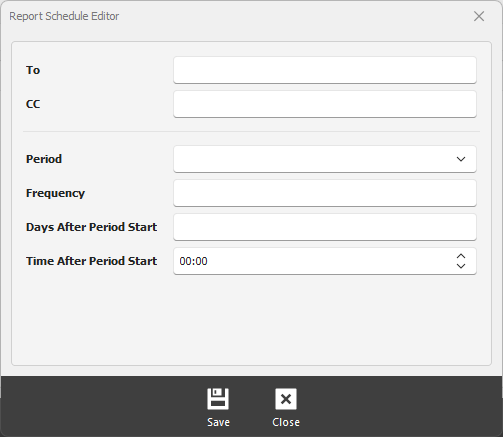
3. Open the Report Schedule Editor
Click on the Add button at the bottom of the Window.
4. Configure the Schedule
1. To - enter the recipient's email address. For multiple email addresses separate them with either the semicolon (;) or comma (,).
2. CC - enter the secondary recipient's email address.
3. Period - select the period the report will be generated.
4. Frequency - The number of times the report is to run after the period
5. Days after the Period start - The number of days to delay the report generation
6. Time after the Period start - The time in hours and minutes (HH:mm) to delay the report generation
5. Click Save to create the schedule.